Modern & Minimal Christmas Wreath DIY

We sing it, we believe it.
“The prettiest sight to see is the holly that will be on your own front door.”
That’s why finding (or creating) the perfect wreath is at the top of every homemaker’s Christmas list. For many, however, a traditional or overly frilly design just doesn’t hack it. I’m among those included. I like my wreaths with a little something different. That’s why I’ve created this DIY project with a modern edge. It’s easy, eclectic, and perfect for decking any hall in your home. You may just want to keep it up year-round… and I certainly won’t judge you for that!

- Brass Tube
- Brown or Black Leather/Suede Cord
- Cotton Twine or Rope
- Christmas Florals
- Floral Wire
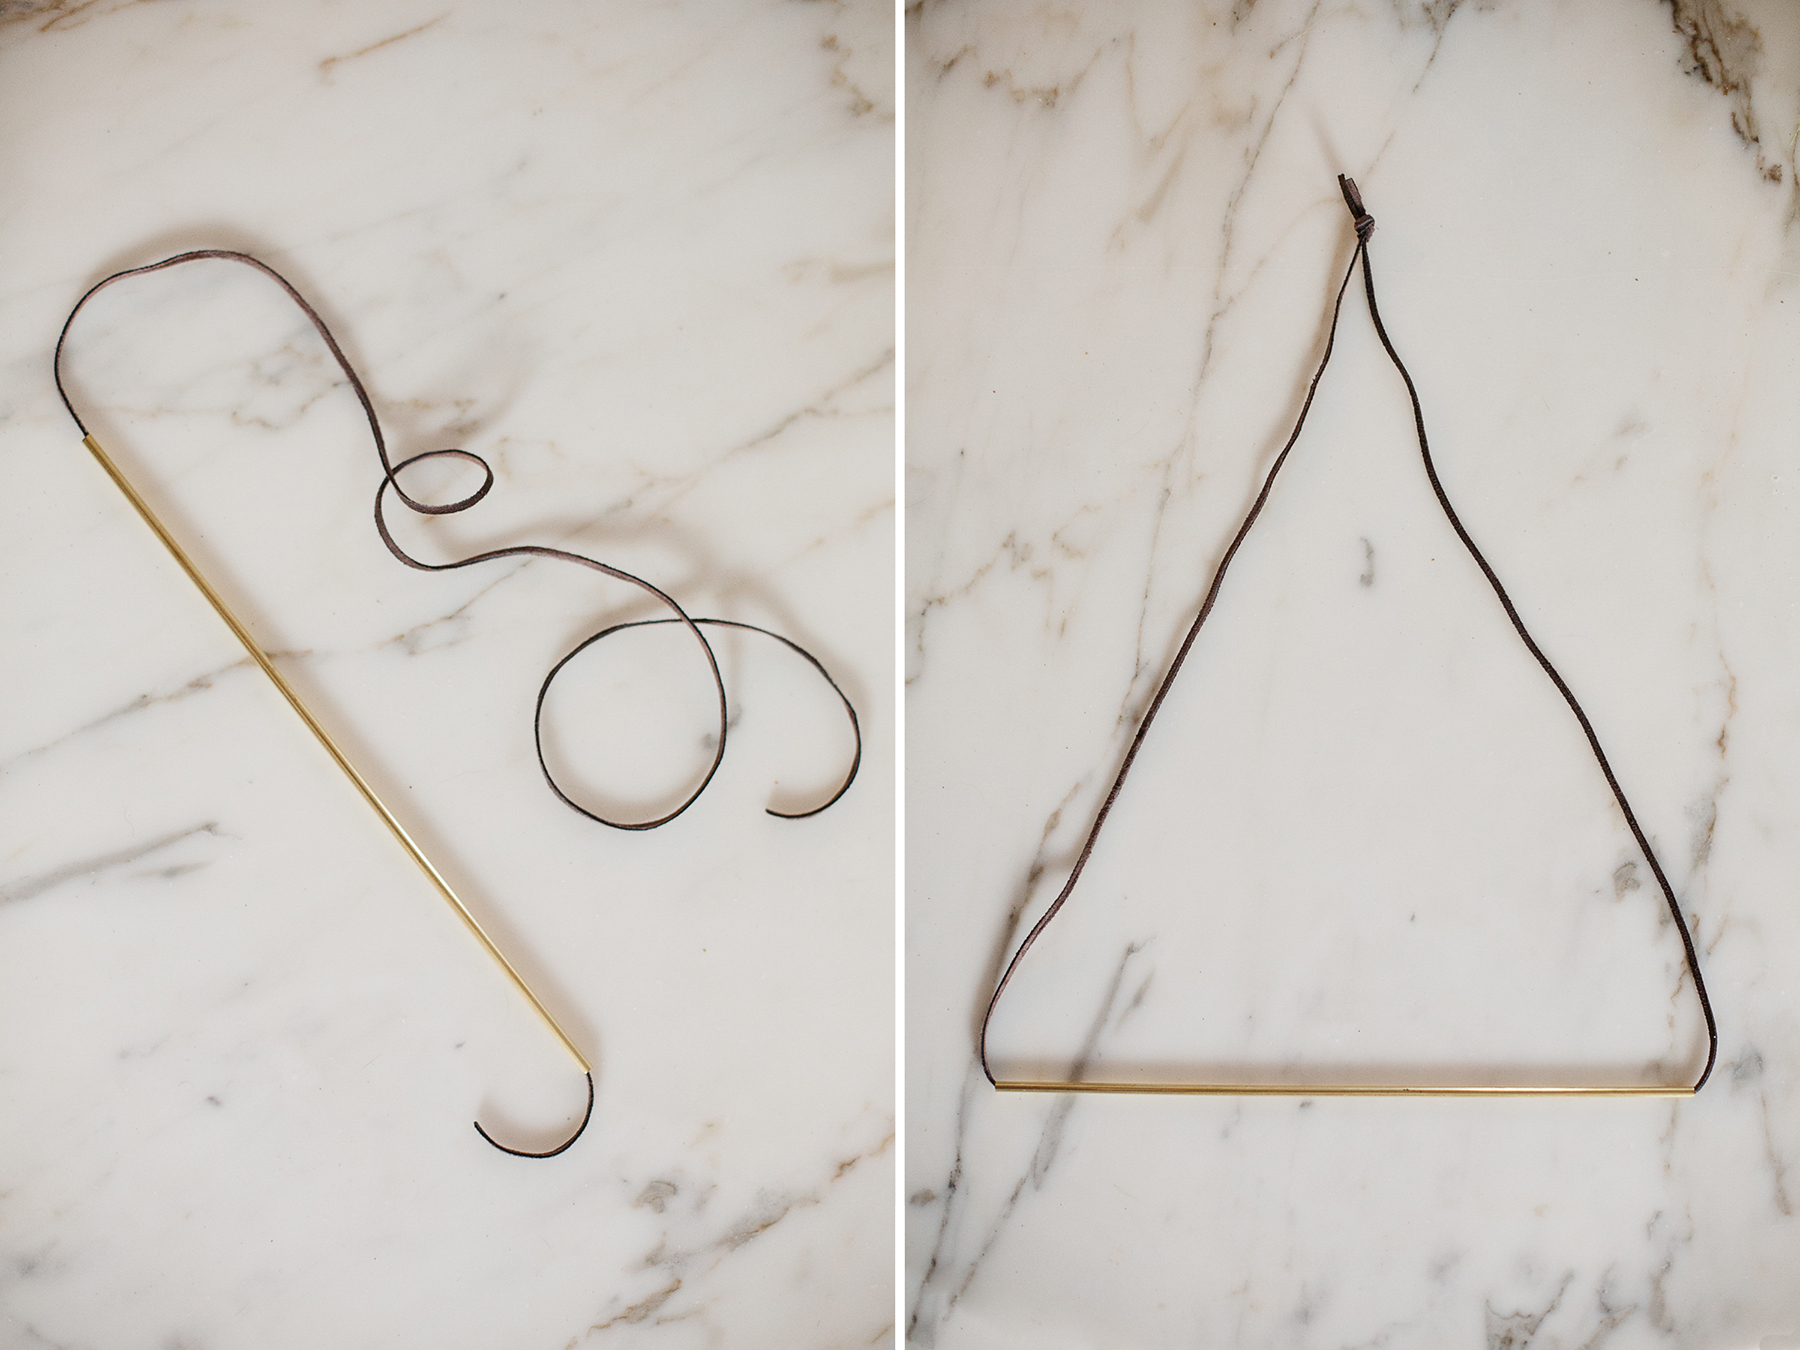
To begin, cut some leather cord about 3.5x the length of your brass tube. My tube was 12″, so I cut the leather cord at 42″. Then carefully thread the cord through the tube, aligning it dead center before tying a knot at the top of the triangular shape created.
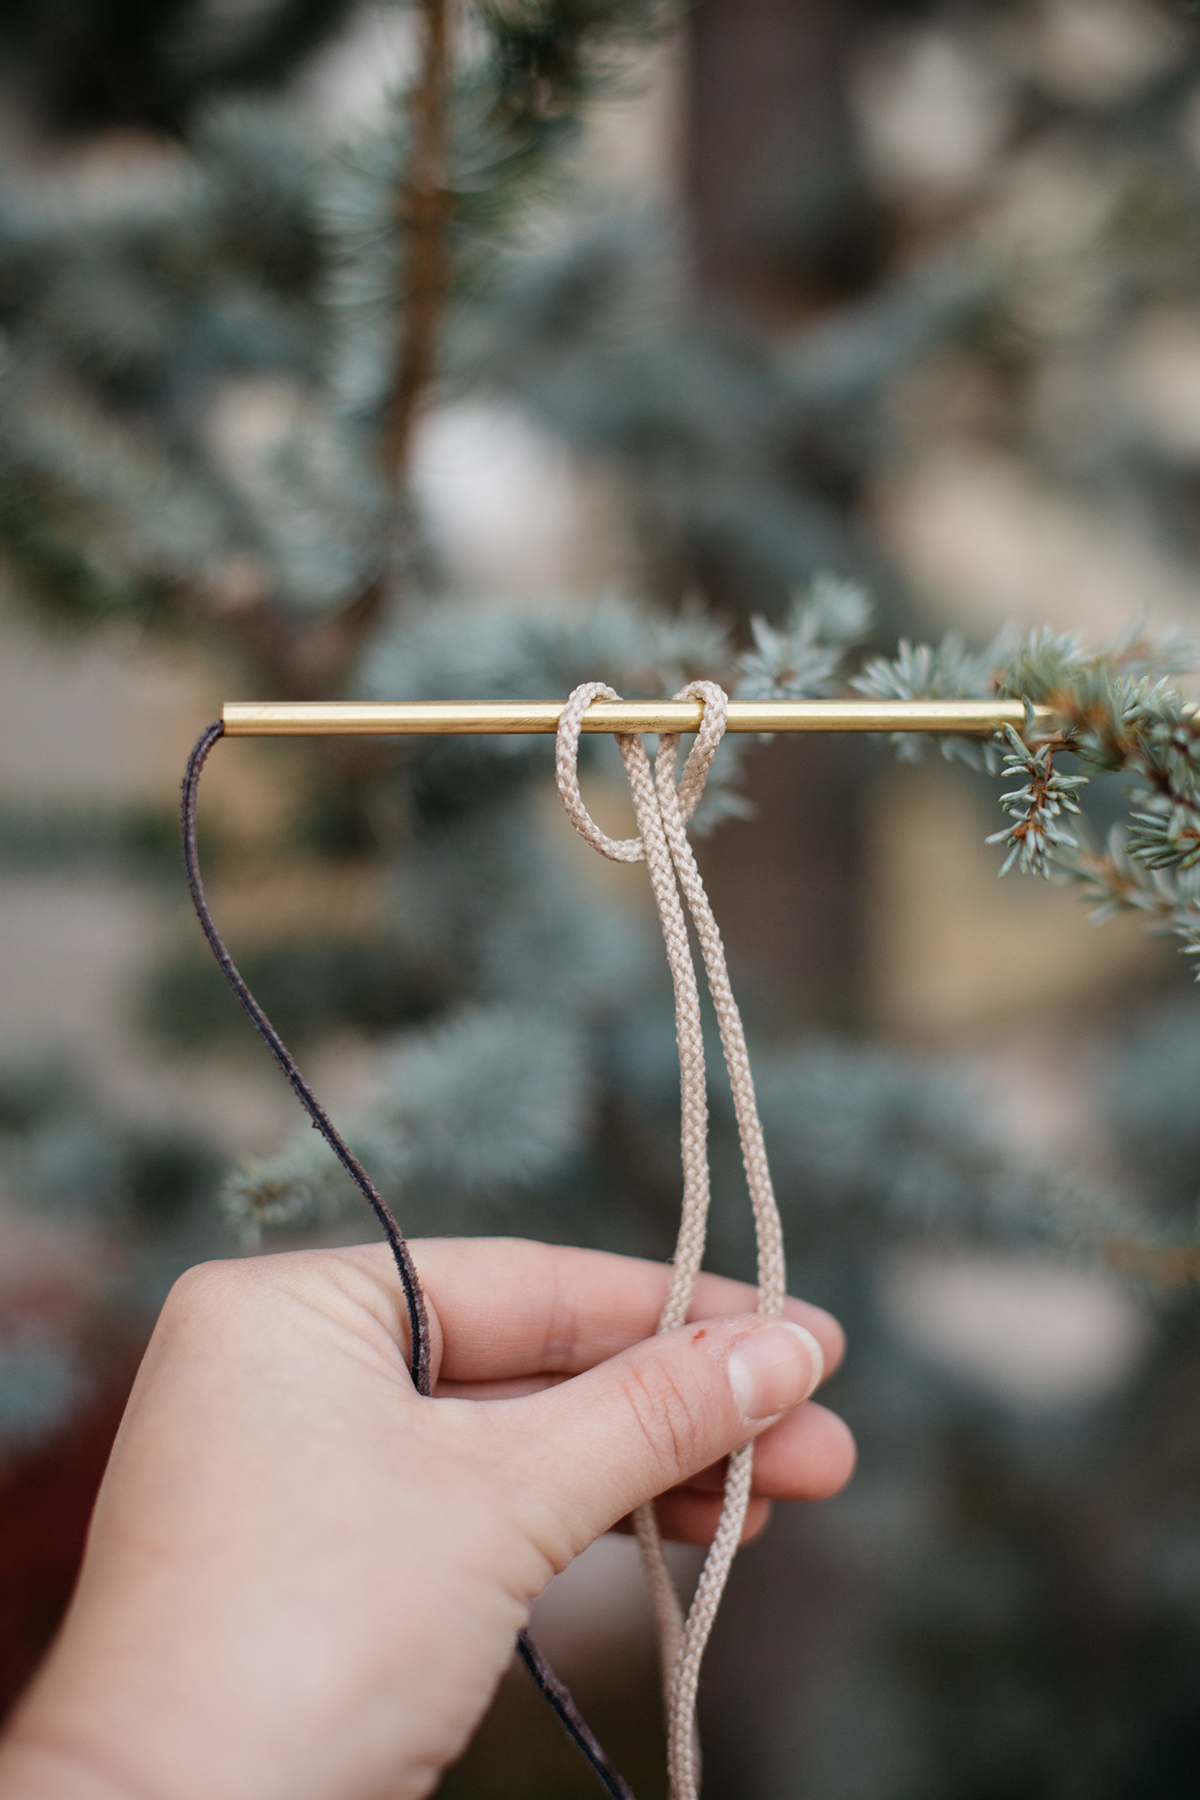
Next, you will add the macrame fringe. Decide how long you want it to hang and cut pieces to twice that length. I cut 18 strands at 18″.
Fold the twine in half, with a loop at the top. Wrap each piece around the back of the brass tubing, and pull ends through the loop at the top in a “lark’s head knot.” Continue for each piece, pulling the knots tightly against the tube.
You are now ready for the foliage!
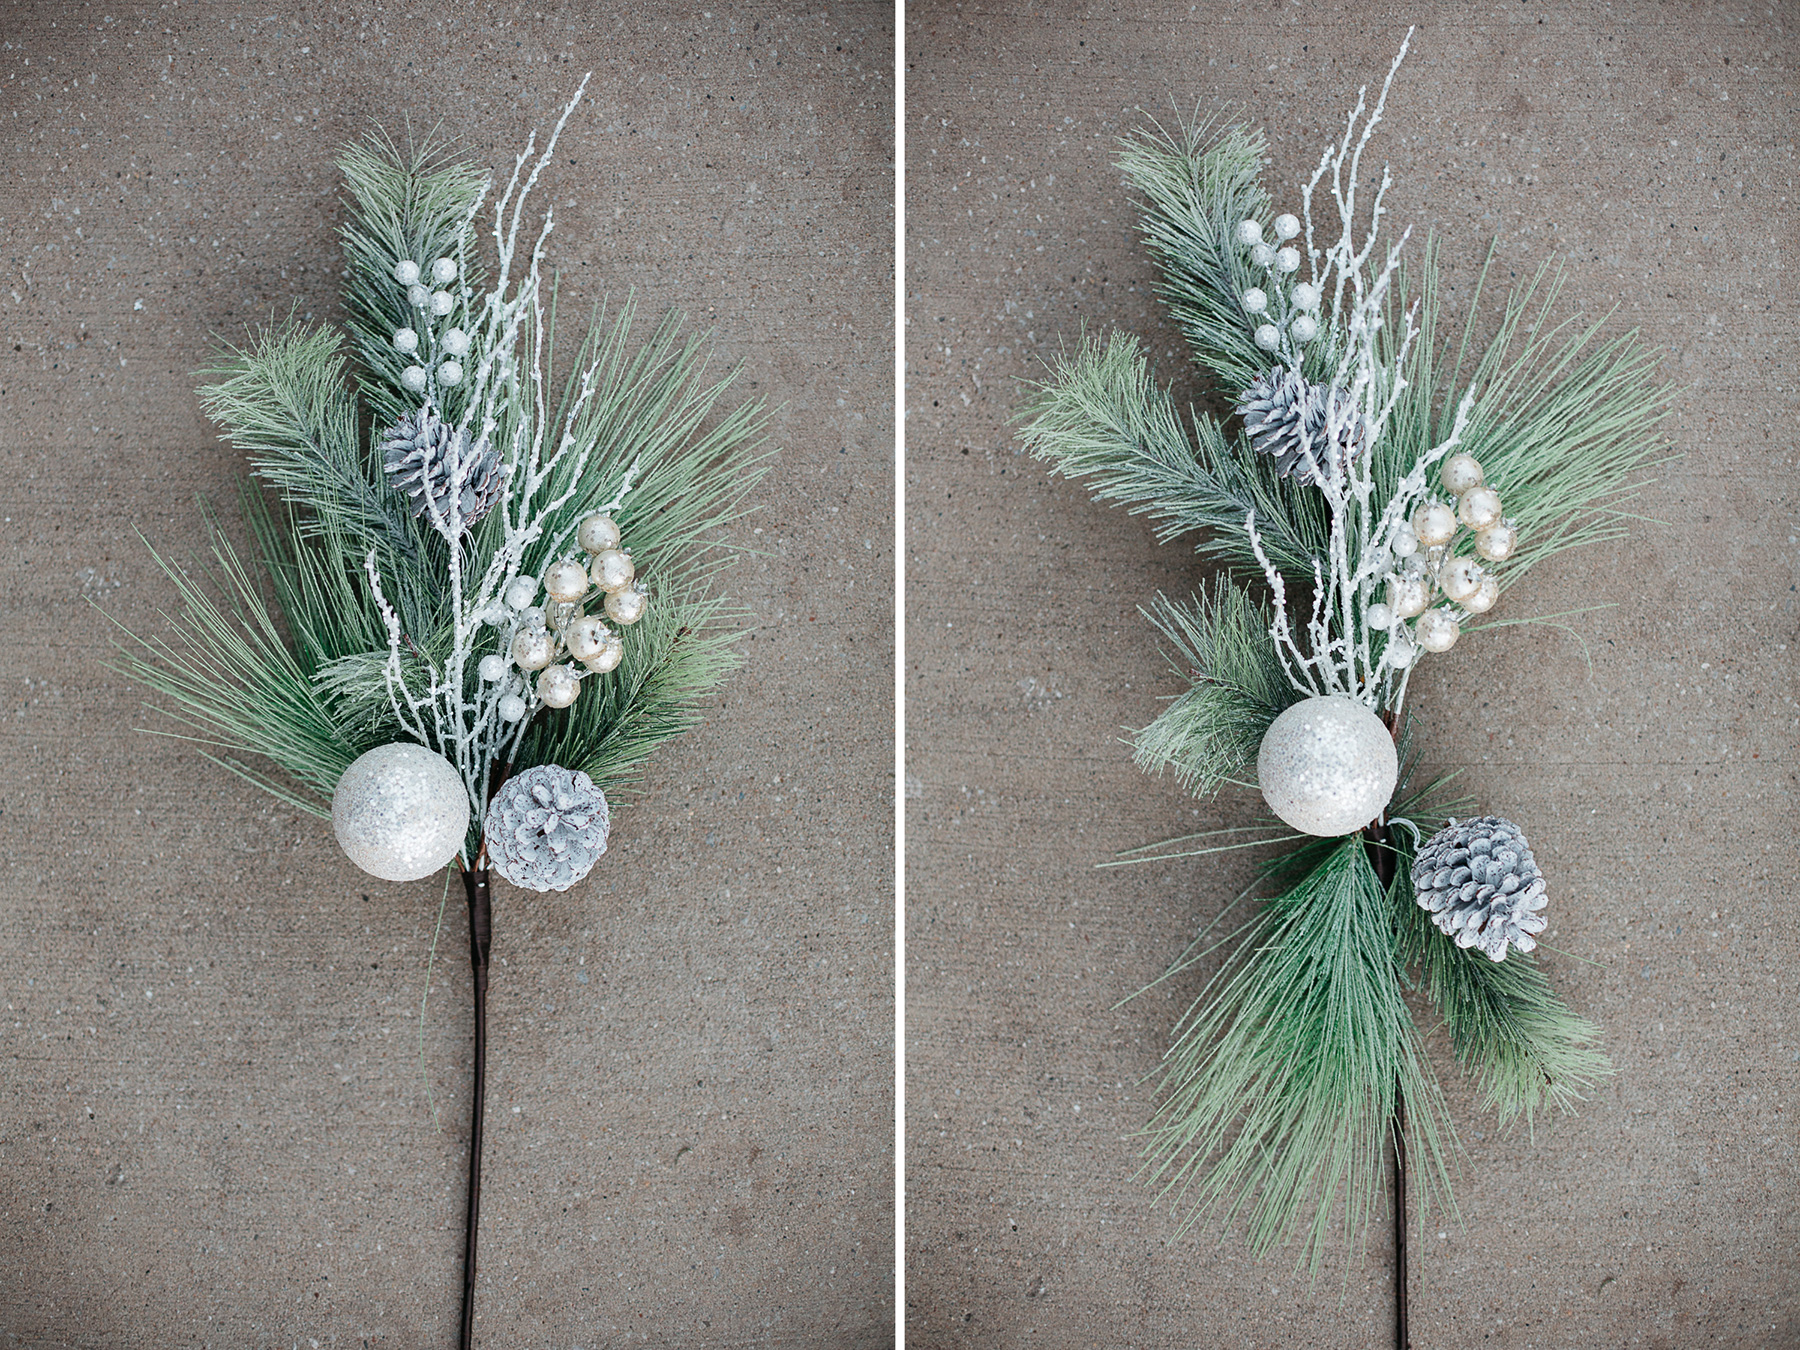
I’m all about making a DIY as easy as possible. So instead of teaching yourself to become a botanical arrangement expert, purchase a pre-arranged branch from Hobby Lobby and doctor it to your liking. I purchased this one from the Christmas florals for 50% off $21.99. Then to create a long and skinny effect, adjust the lower branches to face the opposite direction. see below
Add (or subtract) any additional flair including pinecones, dried eucalyptus, berries, or flowers using floral wire or hot glue. You can also fold in the excess stem or remove it with heavy duty wire cutters. I used it to make a loop for attaching to the wreath body.
At the crux of your foliage, where the greenery splits direction, consider adding large flowers or leaves to ease the transition. Once everything is secure to your branch, it’s time to put the two pieces together.
Lay your triangular wreath body on a flat surface to determine the placement of your foliage. This design works best if you arrange your greenery at a bit of an angle, but feel free to try other configurations. And don’t be afraid to off-center it too! Once you have the perfect look, you will attach the foliage at every point of interception. This can be done with floral wire, but I preferred to use smaller strips of leather cord for an overall cohesive appearance. Be sure to continually hang the wreath against a wall to check that it is hanging properly.


If you LOVE the wreath featured in this article, enter our Giveaway on Instagram! One lucky winner will receive this custom creation by Alice Decker, just in time for Christmas! @thewell.today