Trendy Easter Egg Decorating for Grown-up Gals
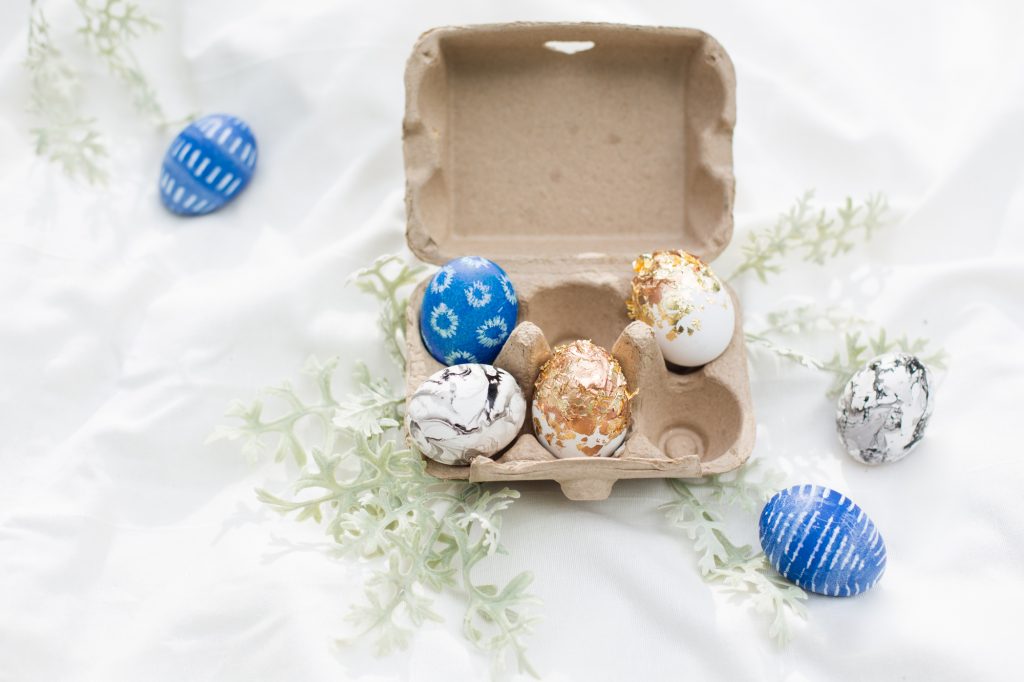
Can you believe Easter is THIS WEEK?! I mean, where has 2017 gone? If you’re like me, you probably haven’t had a chance to focus on Easter’s approach, much less really celebrate the holiday and reflect on what it means. That’s why I decided this week needed a little festive crafting! And what better way to step back and put Easter at the forefront of your mind than with some egg decorating? There are so many unique and fun ways to tap into your creativity with Easter eggs. And much like adult coloring books, it’s good for your stress too.
With that in mind, I decided to experiment with three different styles that are trending in fashion and interior design. These stylish eggs are sure to satisfy your inner artist! Hope you enjoy!
NOTE: To achieve these desired looks, I had to use materials that are too toxic to ingest. It would be most safe to use the blow-out method as opposed to hard-boiling. Plus, you’ll be able to enjoy your decorated eggshells year after year!
Shibori Style Print
Indigo coloring and Shibori prints have been stealing the hearts of eclectic women everywhere. And although I figured this type of patterning might be difficult to translate to an Easter egg, I was up for the challenge. Inspired by this Pottery Barn pillow and fashion from retailers like REVOLVE, I tested out some of my favorite designs using a traditional dye method AND an all-natural one as well. Here are the results…
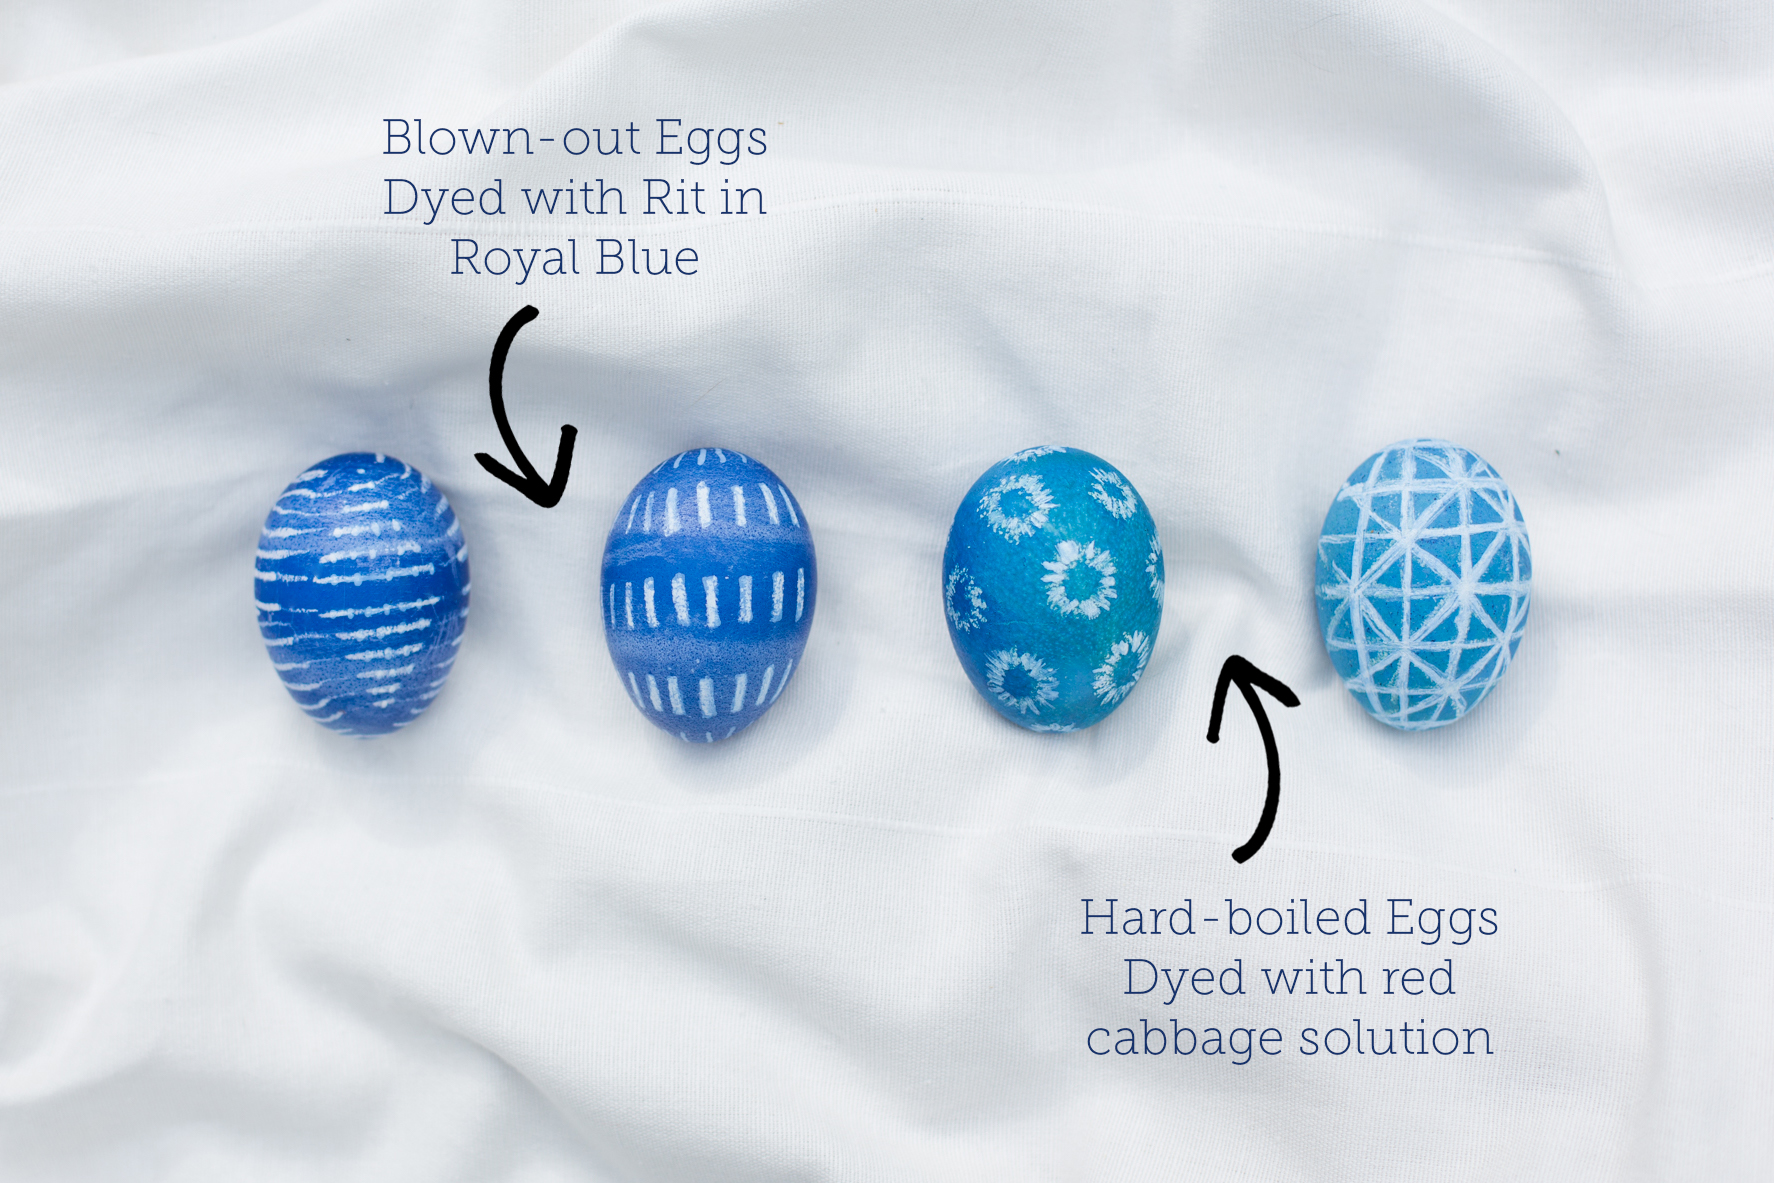
Start by drawing your patterns onto the egg with a white crayon. Then just soak your egg in dye. I liked the deeper color of the traditional dye a little better after it was all said and done. However, I ended up using Rit fabric dye on a blown-out egg (see above), so if you plan on eating yours, you will need to go with either a natural dye or a food-safe option.
For Rit dye
- 2 cups boiling water
- 2 tsp Rit dye in Royal Blue
For a natural dye
- 3 cups chopped Red Cabbage
- 1 quart water (or enough to cover eggs)
- 2 Tbsp White Vinegar
Bring your water to a boil and then add ingredients. Lower the heat and simmer for 30 minutes. Strain the cabbage and let the solution sit until it cools to room temperature. Then soak your eggs overnight for a deep color.
Marble
Marble is probably one of my favorite materials right now. My laptop, coffee table, endless accessories – ALL MARBLE! It only made sense to bring that love to an egg design as well. So I first looked at Pinterest. Following the basic directions from Alice & Lois on their marbled Easter Eggs, I made several trial runs and tweaks to get it just right. I also used a cheap black nail polish for a true faux marble finish.
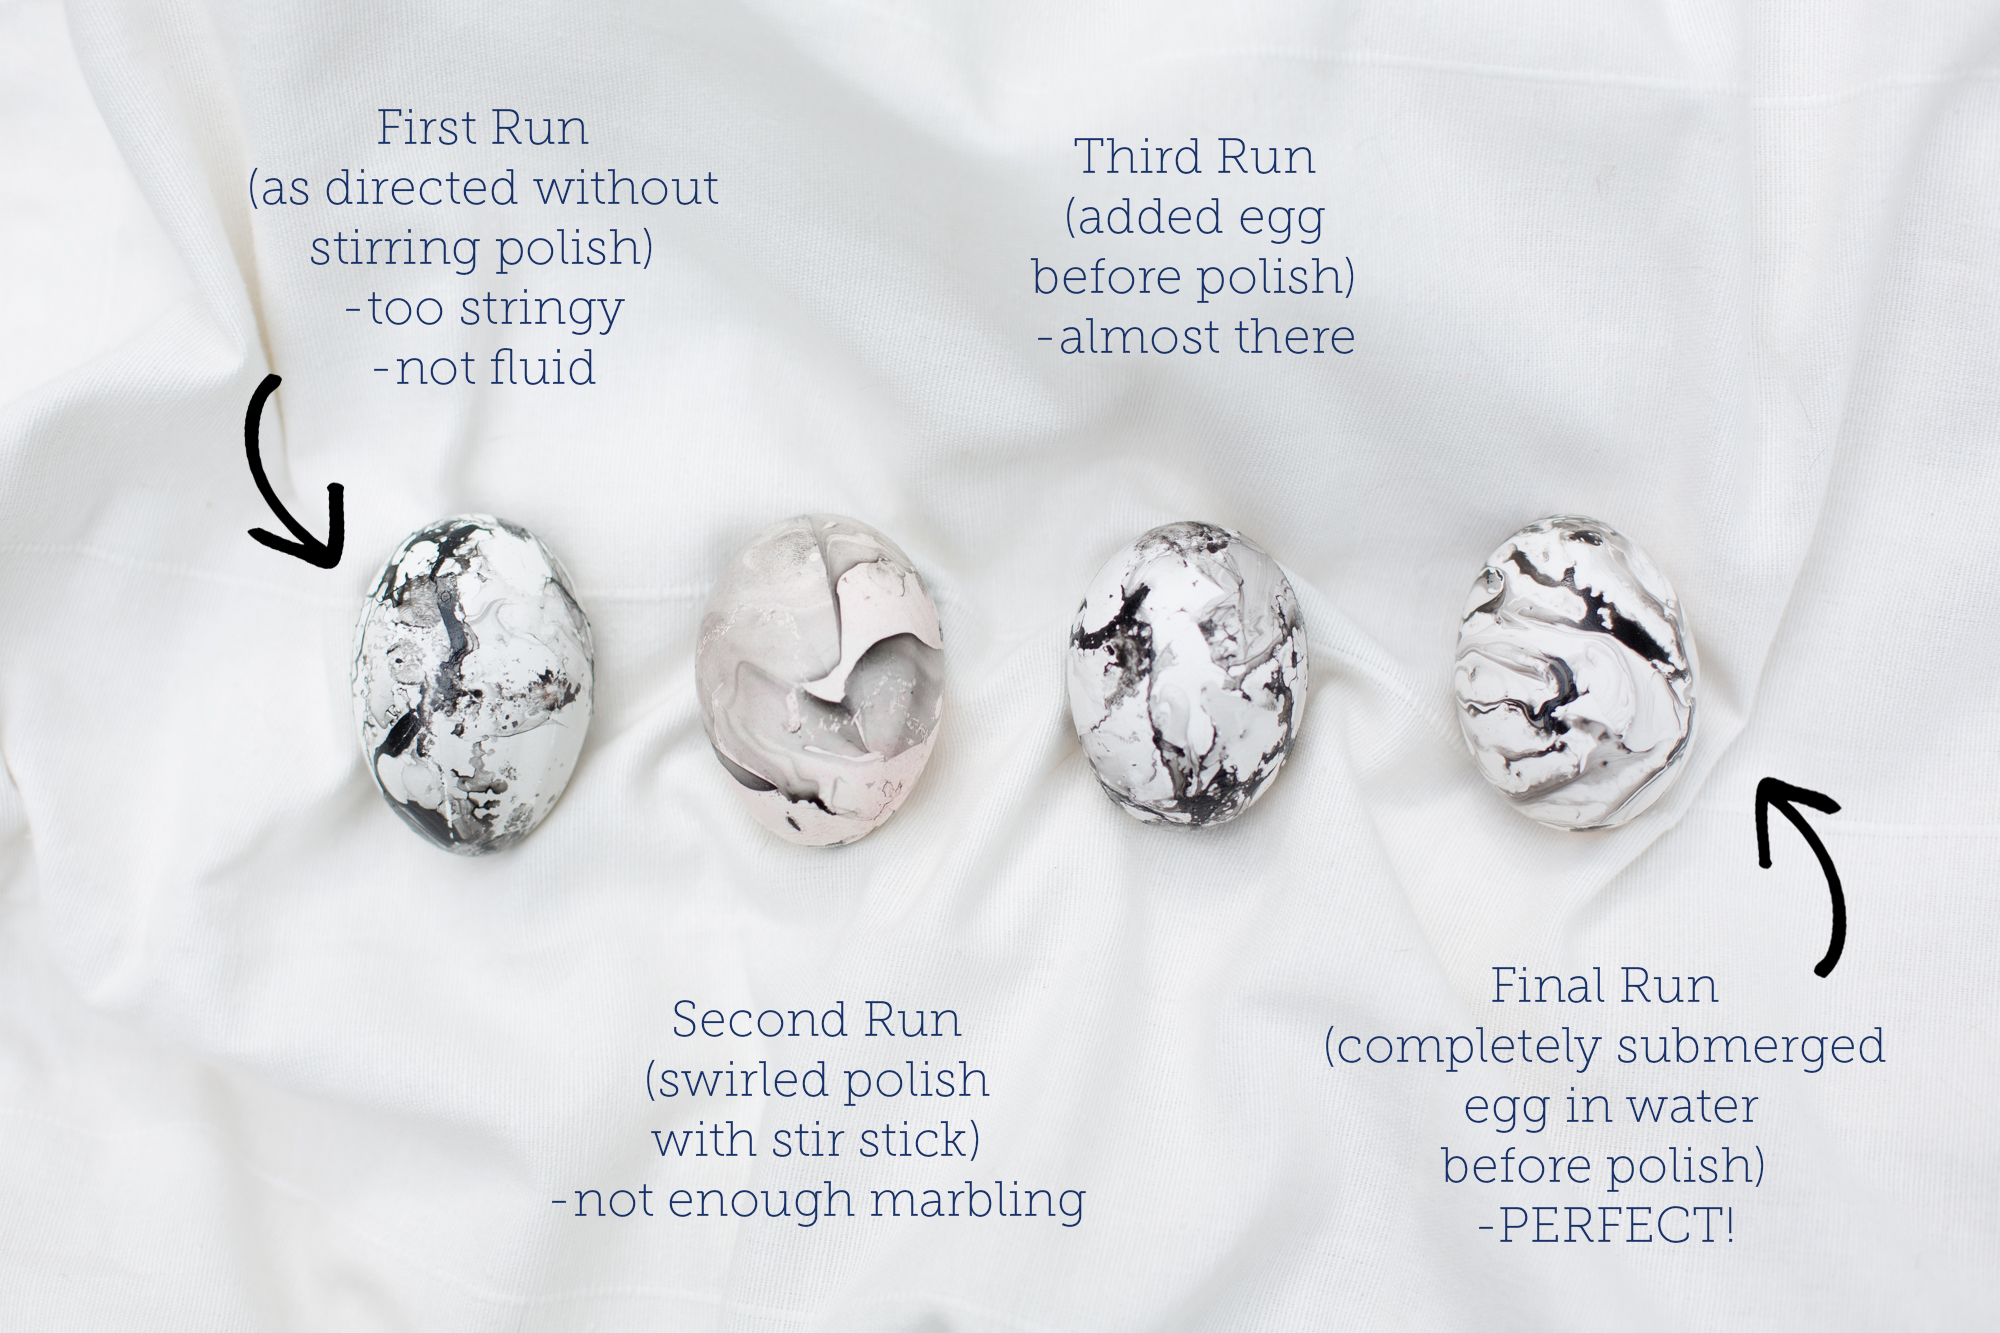
As a word of warning: This method is extremely messy! Use latex gloves and a container you can easily throw away after. I used old tupperware in the sandwich size, which worked great for rolling the egg. A couple of tips that worked for me…
- Don’t stir the polish once in the water
- Throw out the water/polish mixture for each egg. The polish dries quickly and creates a nasty web-like texture so you’re better off starting fresh for each one.
- Place your egg in the water BEFORE pouring in the polish. The wet surface helps the polish adhere with a washed-out look. It also brings out more gray tones so that the pattern has more dimension.
Metallic
Metallics have been around for awhile and aren’t going anywhere anytime soon. And although you may have seen gold-foiled decorating methods here and there, this one creates a sculptured feel. It’s also super easy. All you need is…
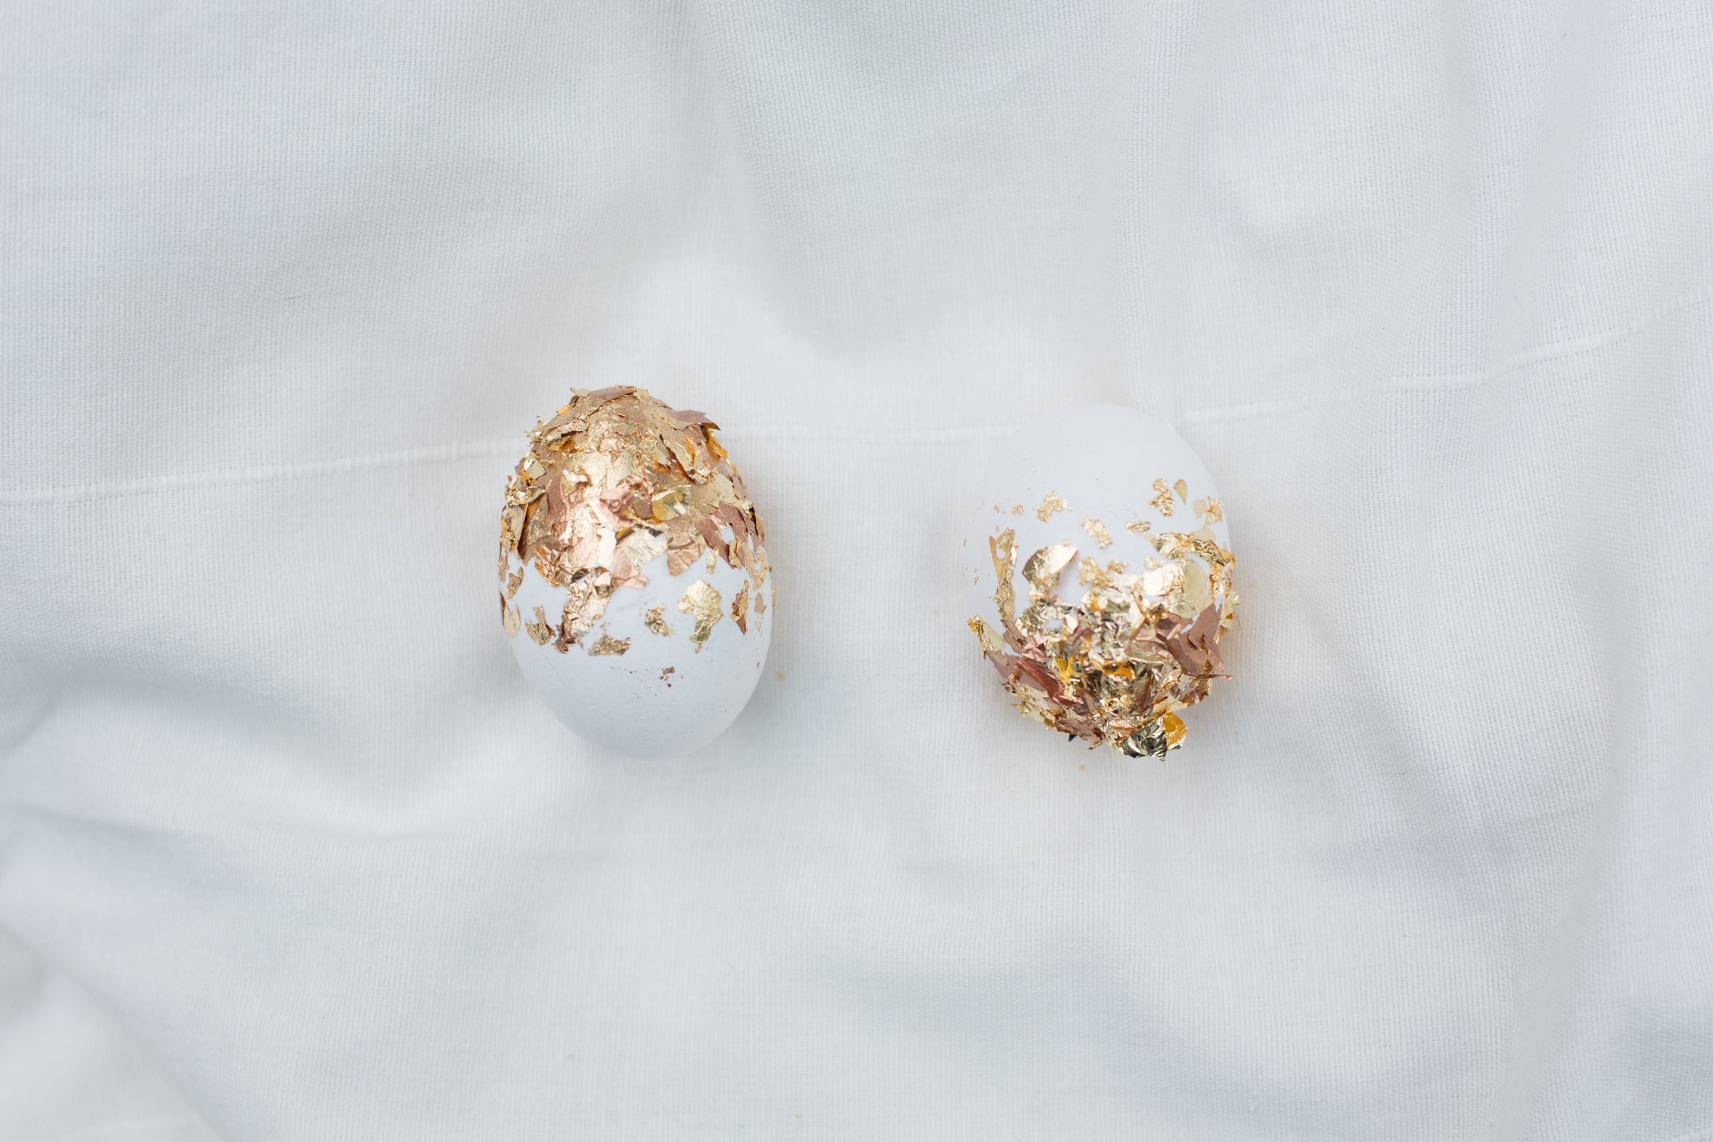
If you want a little extra pizazz, first spray your gold leaf on one side with a Copper Spray Paint. Apply a thin coat of adhesive to a blown-out eggshell and wait for it to become tacky. Then begin tearing off pieces from your gold leaf and adding it to the shell. Be sure to continually add from both sides of your foil for a mixed metallic effect. And build on top of other pieces, scrunching them as needed, to really create a 3D sculpture. Fade off the pieces towards the middle of the eggshell so that it appears to be “dipped” in foil.
